Adding a signal
Setting up a signal takes a few minutes, and most of that is deciding who you want. This page walks through the Add a signal page from top to bottom and explains what each choice does once the signal is running.
Start from Signals in the left menu and click Add a signal, or use one of the shortcuts on the dashboard.
Two ways to begin
At the top of the page is a box where you can describe what you want in words:
"People who comment on Gong's posts, VPs of sales at B2B SaaS companies, into my Outbound list."
Ragworks turns that into a draft: it picks the signal type, fills in the competitors it recognised, suggests job titles, and lists what's still for you to do. You check the draft and create it. If a sentence can't be turned into a signal, it says so and leaves that part out; a draft never guesses silently.

Below the box is the catalog: every signal type as a card, grouped by lane. Each card says what the signal watches, whether it needs a LinkedIn account, and whether it's on already (a signal of that type exists), ready to add, not available for your account yet, or coming soon. Click Add on a card to open its setup form. The signals you can set up describes every card.
The setup form
The form is the same for every signal type. Only the first step changes, because that's where the signal learns what to watch. The steps are numbered, and the panel on the right, What happens every day, reminds you which of them are free.
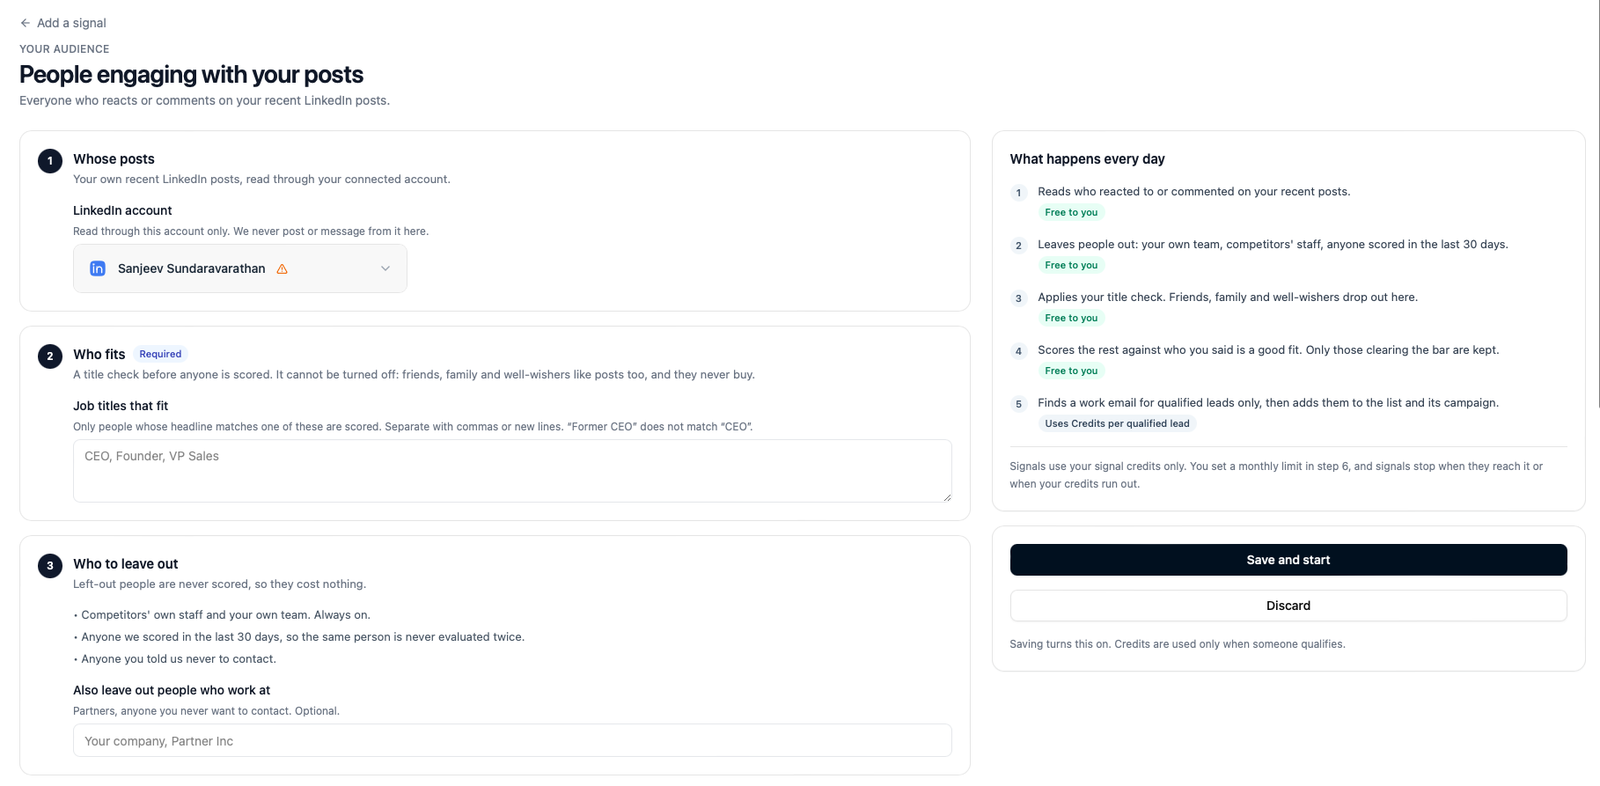
1. What to watch
What this step asks for depends on the type:
- People engaging with your posts. The LinkedIn account to read through. That's all: the signal reads your own recent posts.
- New company-page followers. The account, then the company page. The page picker lists the pages that account administers; pick one. If the page you want isn't listed, choose Not listed? Find a page from its link, paste its address and click Look up. The lookup uses one request from the account's daily allowance, which is why it's a button and not something that happens as you type.
- Job changes. The account (it needs a Sales Navigator seat) and the link of a saved search.
- Competitor engagement. The competitors to watch. Add each one with Add a competitor, or describe what your company sells in the box and click Suggest, then confirm the ones you want. You can also tick Also watch posts by people who lead those companies. The signal does nothing until at least one competitor is confirmed.
- Keyword posts. Up to ten keywords or phrases, comma- or line-separated, and how many days back to read.
- Experts your buyers follow. Up to twenty profile links.
- Company triggers. The watch-list (or filters) to work from, and, for hiring, the departments.
2. Who fits
This is the title check, and it's marked Required because it is the one step that can't be switched off. Type the job titles of the people you sell to, separated by commas or new lines:
CEO, Founder, VP Sales, Head of Sales, Revenue Operations
A few rules, so you know what will and won't match:
- Matching is on whole words and ignores case and accents. "VP Sales" matches "VP, Sales EMEA" and "vp sales"; it doesn't match "VP Salesforce".
- A title preceded by former, ex, aspiring, future, retired or seeking doesn't count. A "Former CEO" is not a CEO for your purposes.
- People with no headline at all are filtered out, since there's nothing to check.
- Words like everyone, all or any are not titles. The form won't accept a list made only of them, because nobody's headline contains them, and every person would be filtered out.
Pick titles for the people who would actually buy, not everyone who might be interesting. The check is there to keep the paid steps focused: a wide list means more people scored, which is free, but also more marginal people qualifying, which isn't.
3. Who to leave out
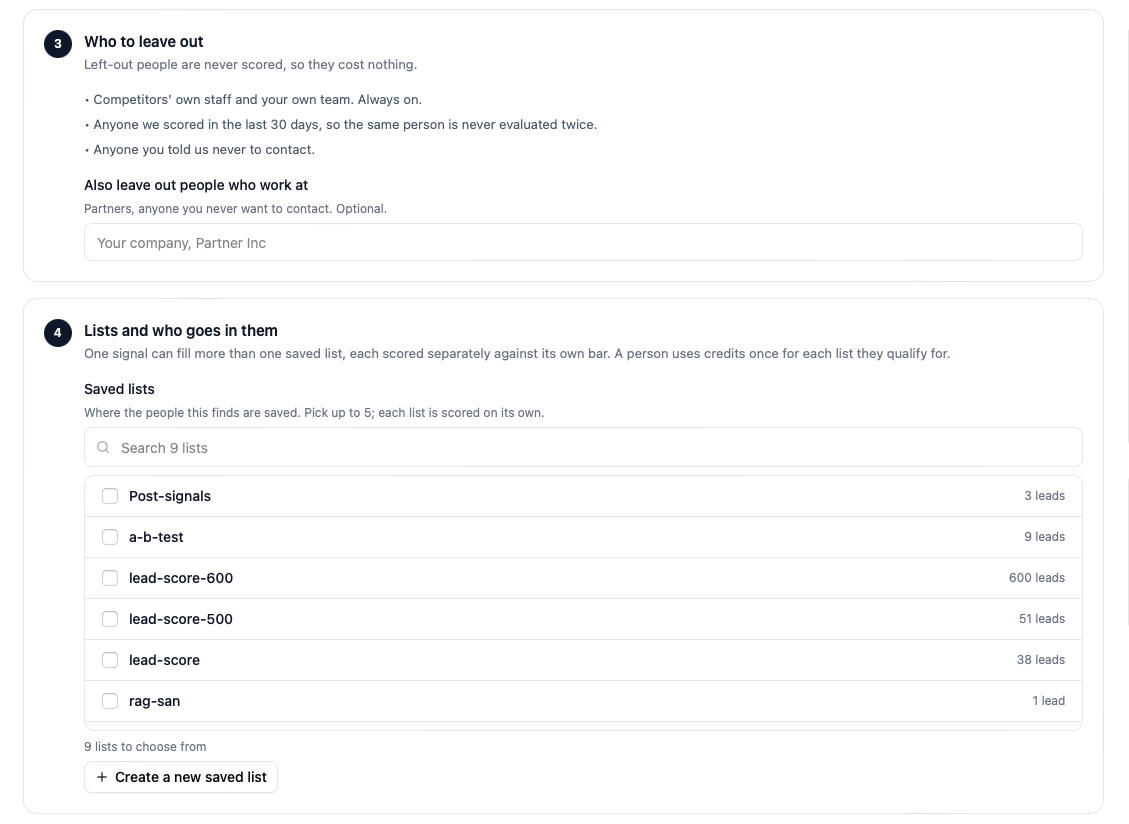
Three rules always apply, and you can't turn them off:
- Competitors' own staff and your own team. Anyone whose headline names your company or a competitor you track.
- Anyone scored in the last 30 days. The same person is never evaluated twice in a month, whichever signal finds them.
- Anyone you told us never to contact. See Leaving people out.
Under Also leave out people who work at, add other company names, separated by commas: partners, customers, anyone you'd rather not approach cold. This is optional.
4. Lists and who goes in them
Pick the saved list, or lists, the people this signal finds should land in. You can pick up to five, and each is scored separately against its own bar. A person who clears the bar for two lists goes into both, and uses credits once for each.
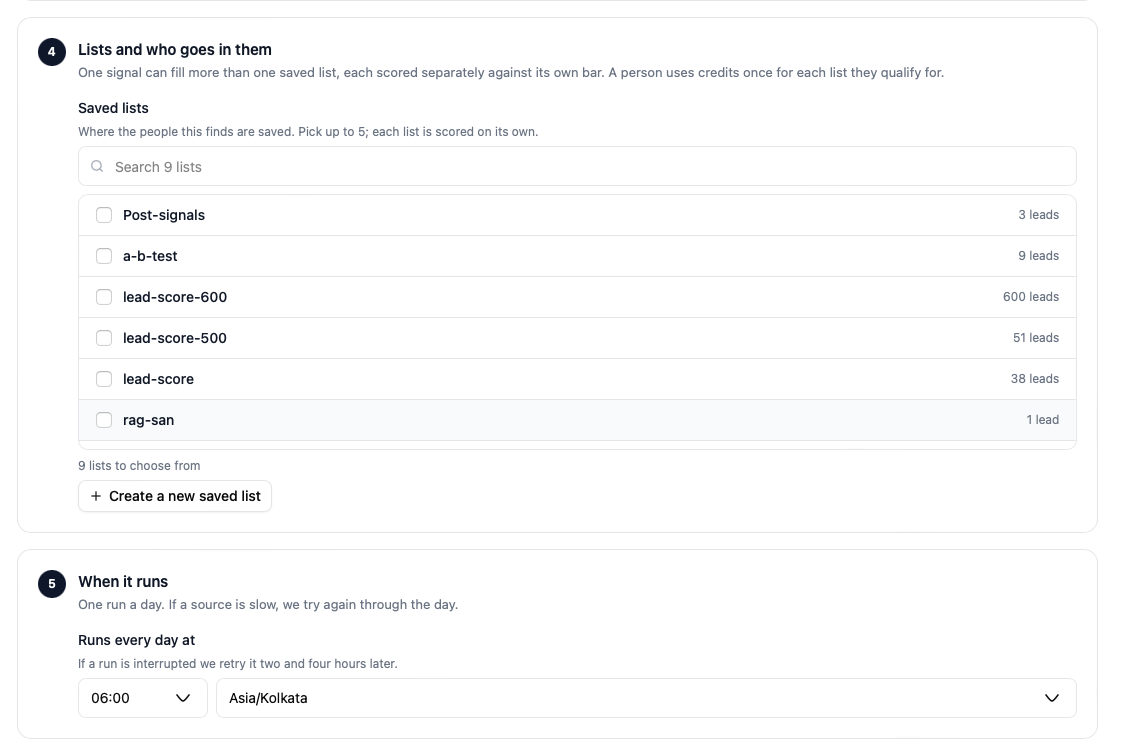
The lists you've picked stay open at the top. For each one:
- Who is a good fit for this list? A sentence or two describing your ideal customer for this list. This is what the score is measured against, so be concrete: "Heads of sales at B2B SaaS companies with 11 to 50 staff, selling to mid-market" scores better than "sales leaders".
- The minimum score. The bar a person has to clear to be added, from 0 to 100. The slider shows what the bar means. A strict list that feeds a campaign directly might sit at 70; a looser nurture list at 40.
The rest of your lists sit in a short box underneath that scrolls, with a search field above it once you have more than a handful (it says how many lists there are to choose from). If you don't have the list you want yet, Create a new saved list makes one and picks it in one go.
Two lists with different bars is a common setup: a strict one that goes straight into a campaign, and a looser one you review by hand. Both are fed by the same signal, and each qualified person costs the same ten credits per list.
5. When it runs
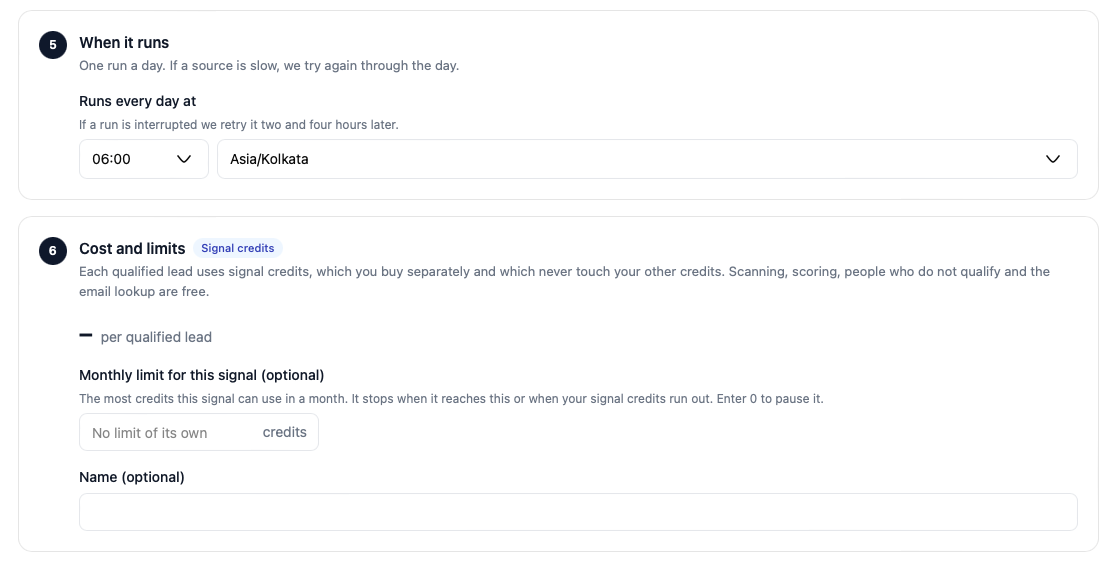
Choose the hour of the day the signal runs, in your timezone (the form picks up your browser's zone; change it if the account lives elsewhere). Runs happen on the hour.
If a run can't finish, for instance because a data source was slow, Ragworks tries again two hours later and once more two hours after that, on the same day. A completed run is never repeated, so the retries can't double up anyone.
Inbound signals, when they arrive, won't have this step: they'll run when your tool sends an event.
6. Cost and limits
This step is about money, and it's short on purpose.
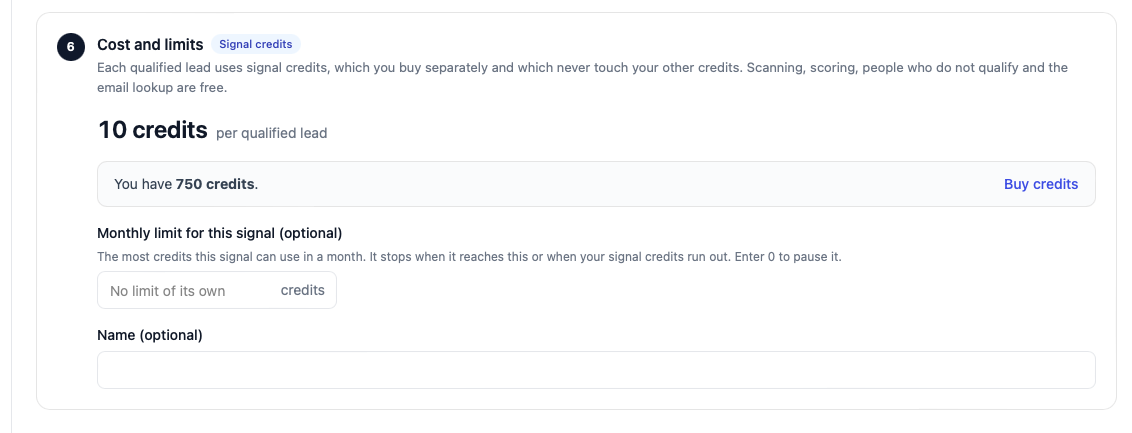
- 10 credits per qualified lead. The price, stated where you're about to commit to it. Only people who qualify use credits.
- Your balance. You have 750 credits, with a Buy credits link if it's low. The page warns you here, before you start, when the balance wouldn't cover even one lead.
- Monthly limit for this signal (optional). The most credits this signal can use in a month. When it's reached the signal pauses with Paused: your monthly spend limit was reached until the first of the next month, or until you raise the limit. Leave it empty for no limit; your credit balance is then the only stop. Entering 0 pauses the signal outright, which is handy for setting one up and starting it later. You can change the limit at any time from the signal's own page.
- Name (optional). A label for your own use, for when you have several signals of the same kind.
Save and start
Save and start creates the signal and switches it on. Nothing is read until its first scheduled hour; on the dashboard the signal shows First run pending until then. Credits are only ever used when someone qualifies.
Discard throws the draft away.
Saving a your-audience signal also schedules it on your account. If the account has already spent today's allowance on other signals, the first run simply waits for tomorrow; you'll see it on the signal's page as Paused: today's LinkedIn request limit was reached.
Changing a signal later
A signal's own page lets you pause and resume it, delete it, change its monthly limit, and see its setup. The things you set in steps 1 to 4 are shown there. To change them, create a new signal; the old one keeps its history.