Create a sequence
This guide builds a sequence in the editor and publishes it so a playbook can use it. For what sequences are and how they fit with playbooks and campaigns, see Sequence.
Before you begin
Decide:
- which channels you will send on, and which one opens the conversation
- what should happen to a lead the first channel can't reach, or who doesn't accept your LinkedIn invite
- how long to wait between touches
If one of the predefined templates already matches your plan, start from it rather than from a blank canvas.
Step 1: Open Sequences
- In the left sidebar, click Playbooks.
- Open the Sequences section.
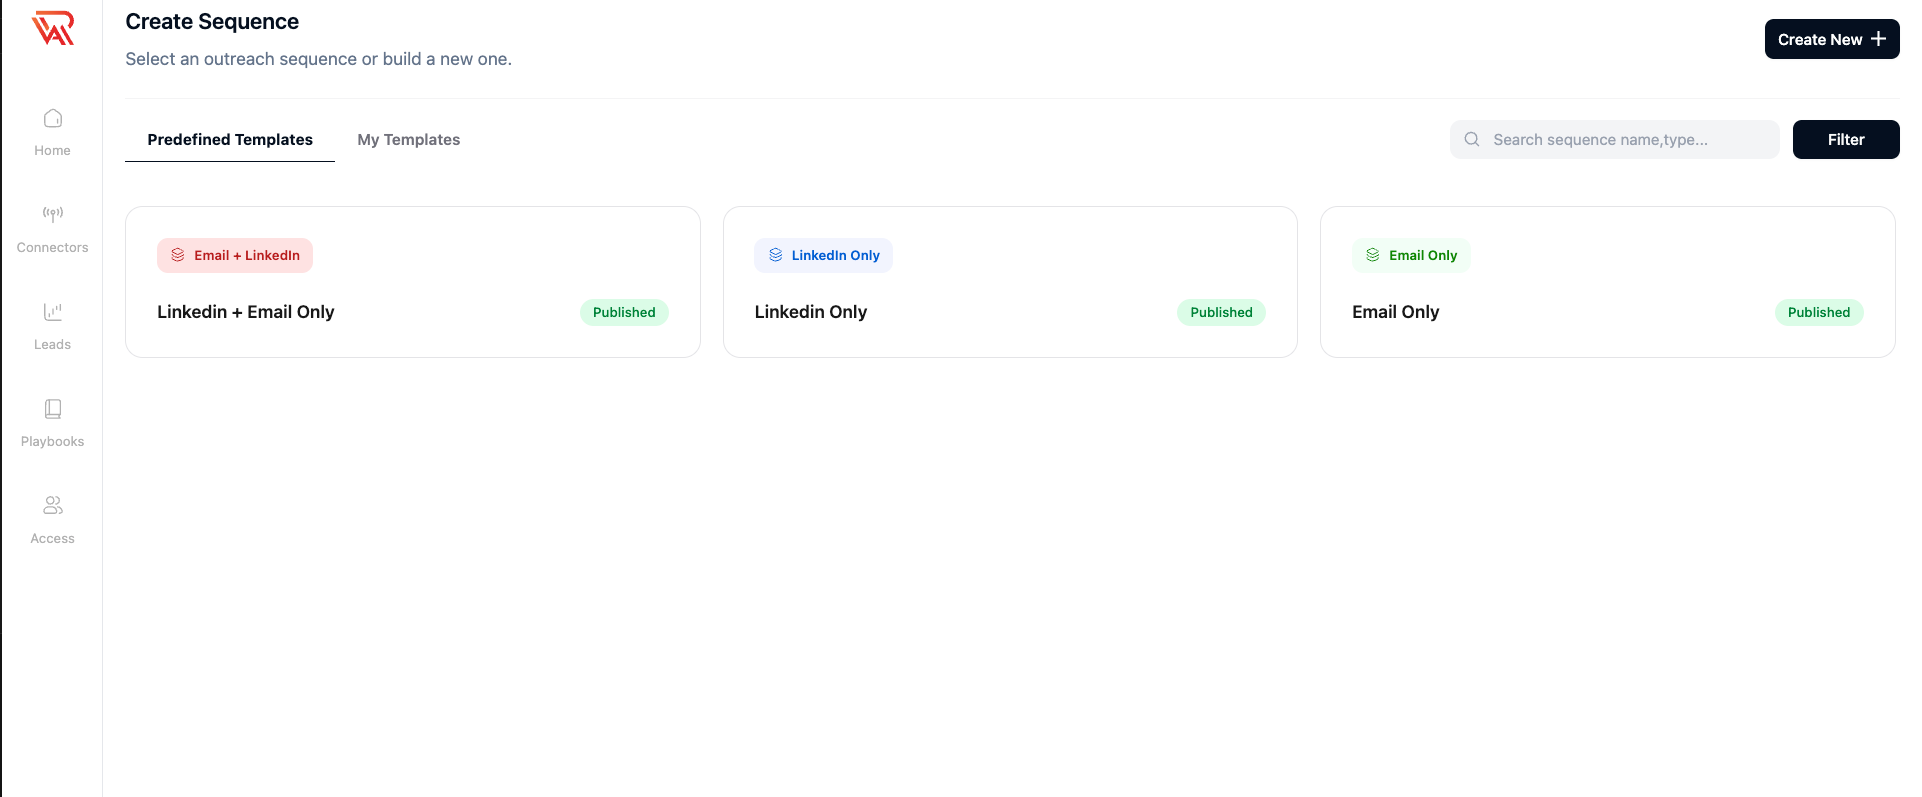
It has two tabs: Predefined Templates, the ready-made sequences from RagWorks, and My Templates, the sequences you have made, published or in draft.
Step 2: Choose a starting point
From a predefined template
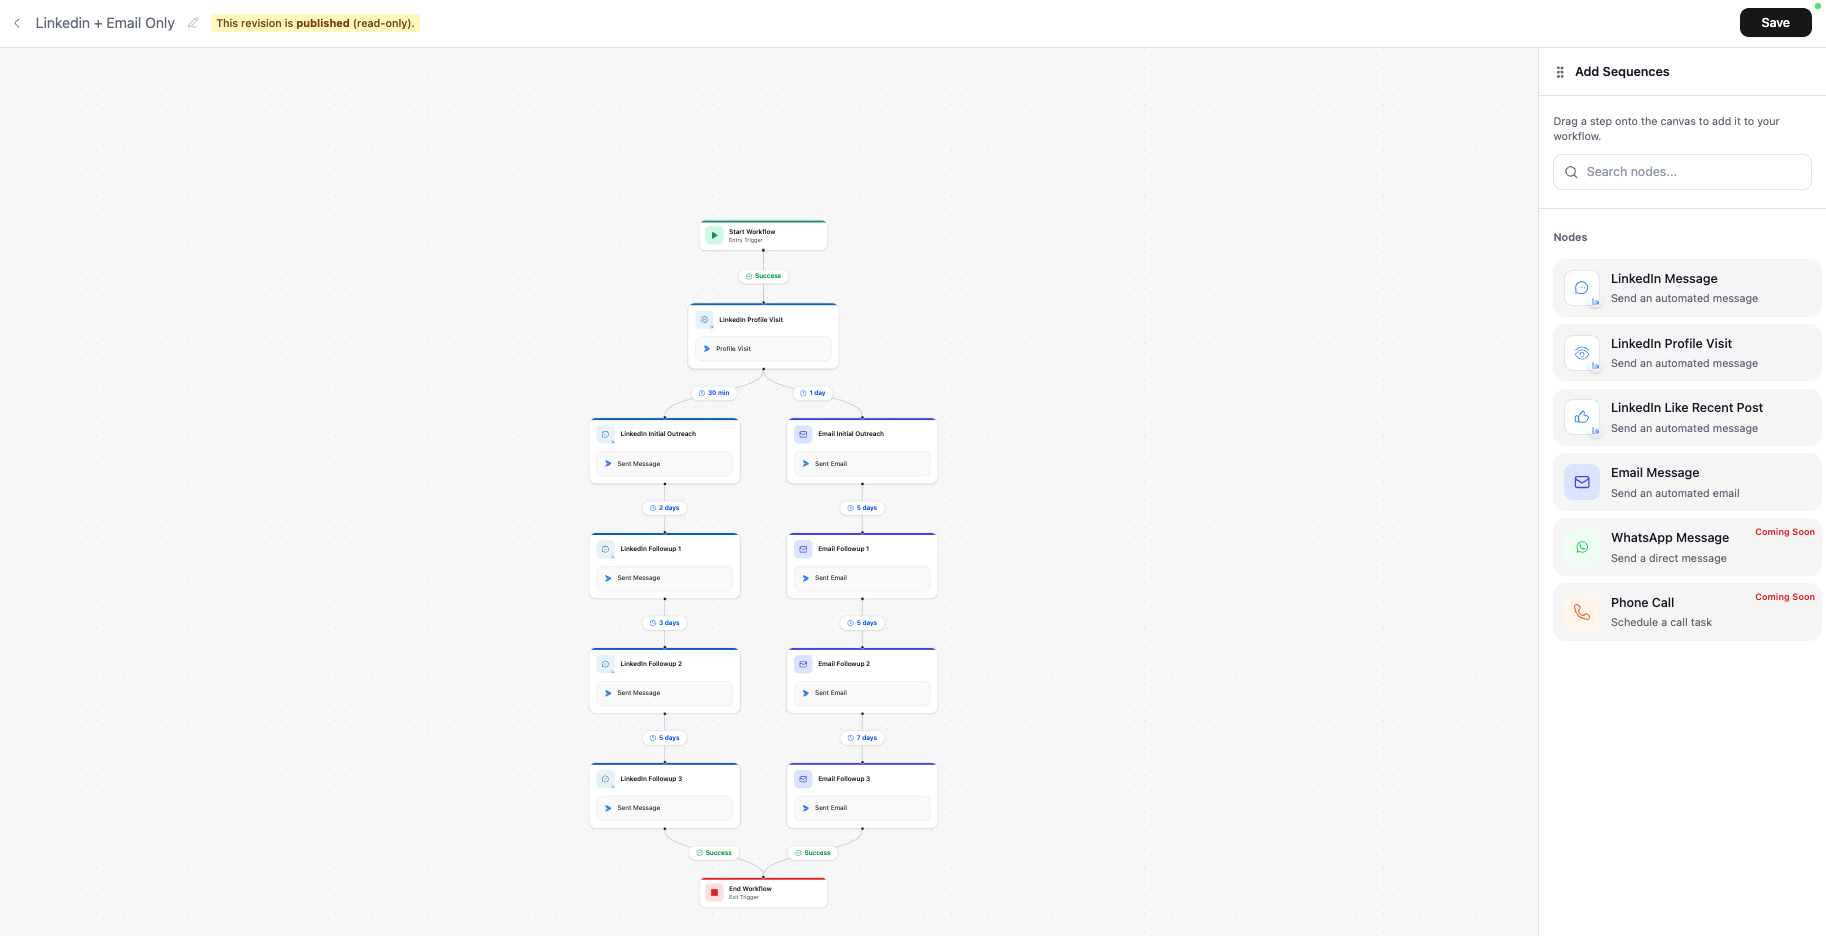
- In Predefined Templates, click a template to read its description, then Preview Workflow to open it. It opens read-only.
- Click Save and name your copy. It is saved to My Templates as a draft you can edit.
- Open the draft from My Templates, change what you need, and publish it.
From a blank canvas
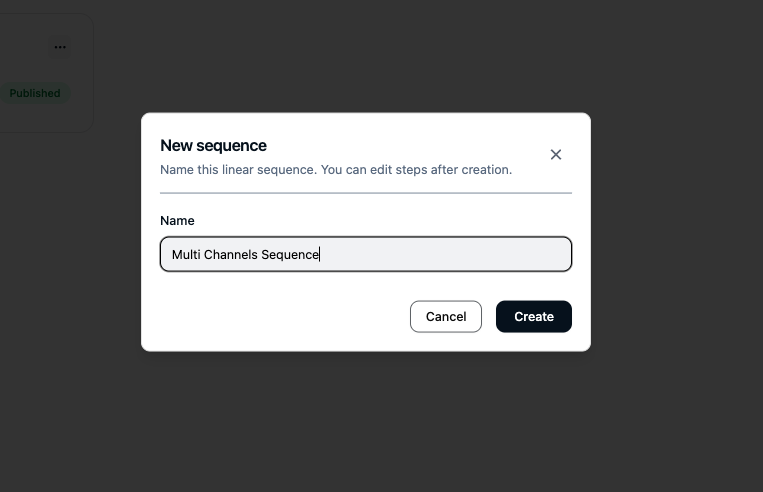
- Click Create New +.
- Name the sequence after its cadence or channels rather than a campaign, for example
LinkedIn first, email fallback— it is easier to reuse. - Click Create. The editor opens with a Start and an End.
Step 3: Build it
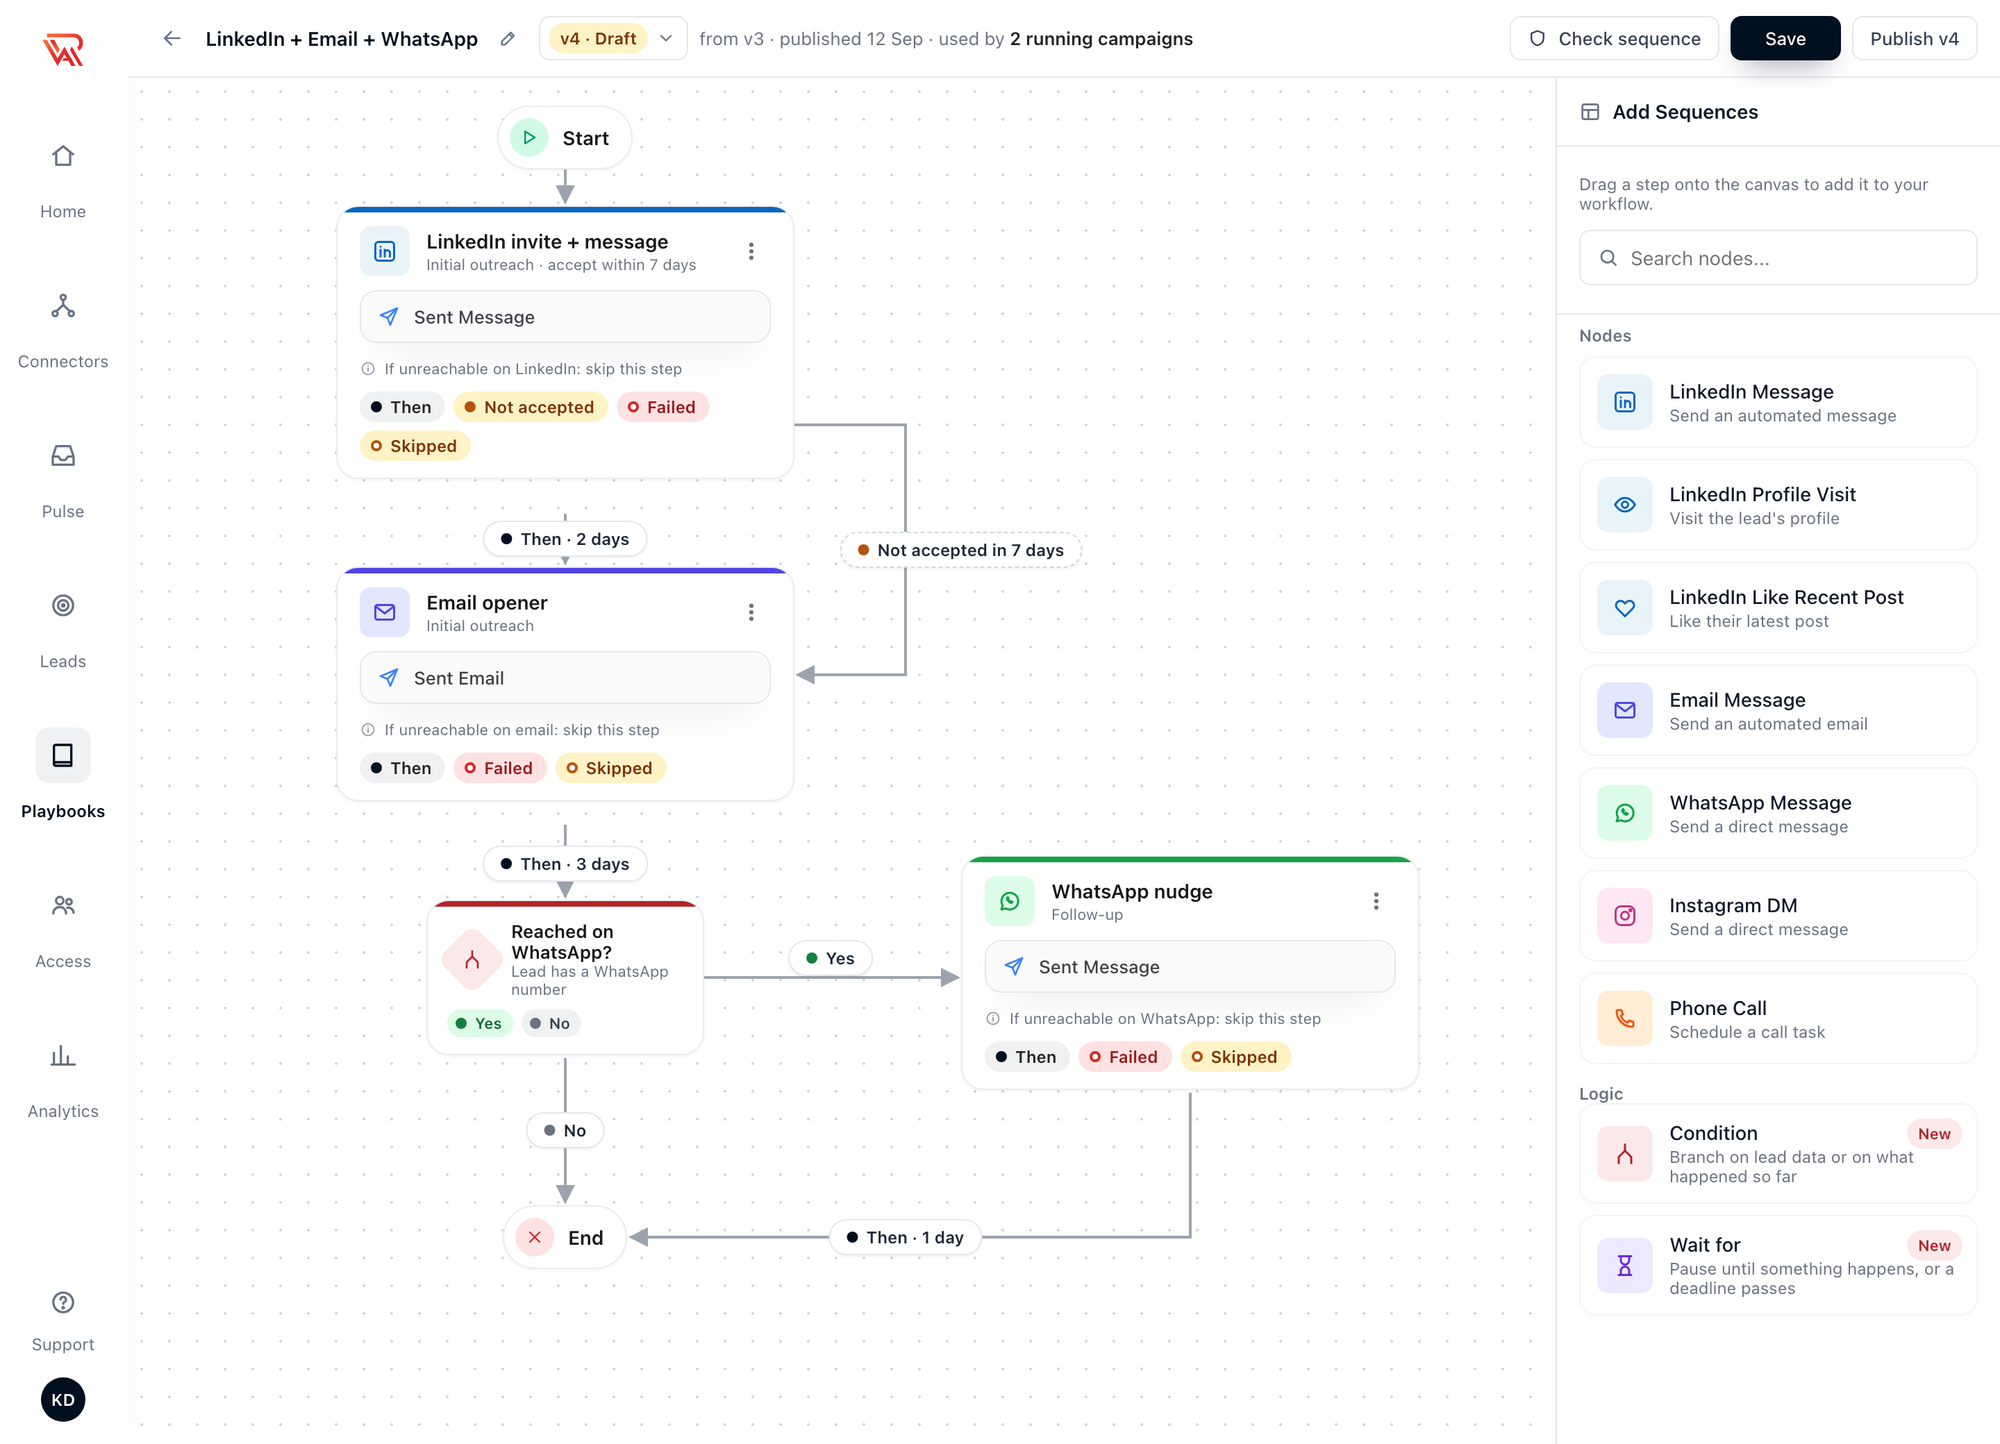
The header shows the sequence's name and version, for example v4 · Draft, with the version it came from and how many running campaigns use it. Check sequence, Save and Publish sit on the right.
Add steps
Drag a step from the Add Sequences panel onto the canvas. The Nodes group holds the channel steps; the Logic group holds Condition and Wait for. See Steps for what each one does.
Open LinkedIn with a Profile Visit or Like Recent Post a day before the connection request. Warm-up steps lift acceptance rates, and they never stop a sequence if they can't run.
Connect the ports
Under each step is a row of ports. Then is always shown; the other ports appear when you hover over the step, once they are connected, or always when Show outcome ports on the canvas is on in the step's settings.
To choose where a lead goes next, drag from a port onto the next step. Every step needs a line from Then; a Condition needs both Yes and No, and a Wait for needs both Happened and Timed out. A line can go straight to End.
See Outcome ports for what each port means and what happens when you leave one unconnected.
Set the waits
Each line carries its wait, shown on the pill in the middle: Then · 2 days, Failed · same day. Click the pill to open Wait after Then (or the port's name), enter a number and choose Seconds, Minutes, Hours or Days. A line with no wait runs the next step the same day, inside your campaign's working hours.
When two ports of one step lead to the same next step, the canvas draws them on one line with one pill, for example Not accepted in 7 days | Failed · same day. Each part still keeps its own wait.
Step settings
Click a step to open its settings.
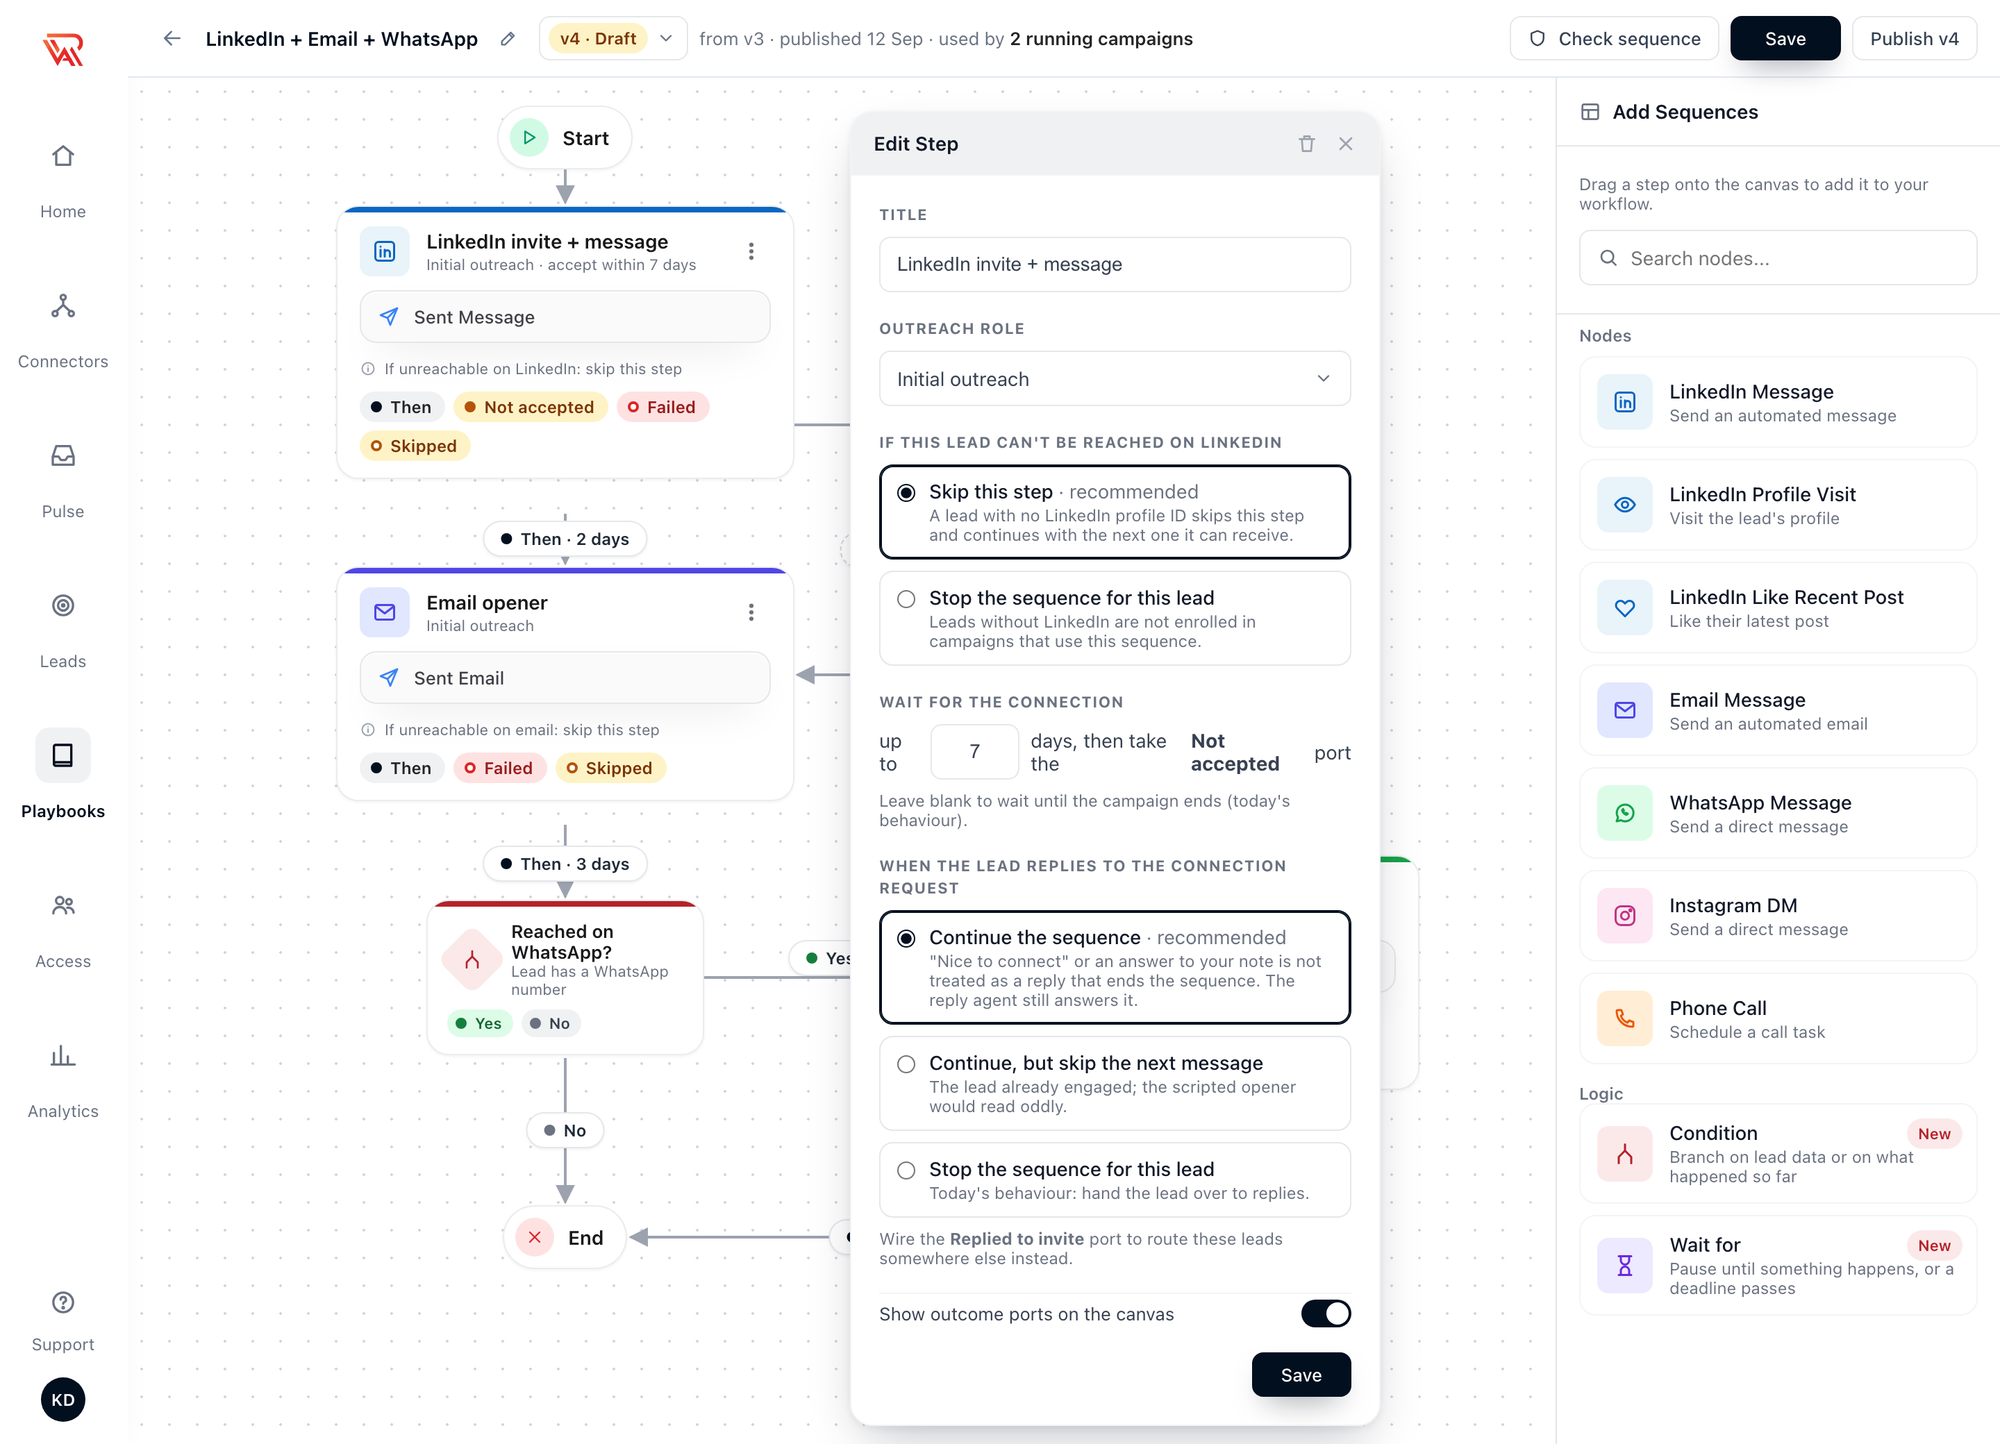
| Setting | What it does |
|---|---|
| Title | The step's name on the canvas, in lead progress and in the playbook |
| Outreach role | Initial outreach or Follow-up. On LinkedIn, initial outreach sends a connection request with a note and, once it is accepted, a message; on email it opens a thread |
| If this lead can't be reached on … | Skip this step (recommended) or Stop the sequence for this lead. See Leads who can't be reached |
| Show outcome ports on the canvas | Shows every port under the step all the time, not only on hover |
The acceptance window
LinkedIn connection requests have one more setting: Wait for the connection up to N days, then take the Not accepted port (1 to 30 days).
With a window set, a lead whose invite is still pending when it ends takes Not accepted, typically to an email instead. Leave it blank and the step waits for the connection as long as the campaign runs; the Not accepted port is only offered once a window is set.
The predefined templates that send email use a 3-day window.
Replies to your connection request
A lead who answers the note on your invite — "Thanks, happy to connect" — has not replied to your outreach yet. When the lead replies to the connection request chooses what the sequence does:
| Option | What happens |
|---|---|
| Continue the sequence (recommended) | The AI agent answers them, and the sequence carries on |
| Continue, but skip the next message | As above, but the next message step is skipped: the lead already engaged, so a scripted opener would read oddly |
| Stop the sequence for this lead | The reply ends the sequence, like any other reply |
To send these leads down a different route instead, connect the Replied to invite port. A reply that comes after your first LinkedIn message is a normal reply and ends the sequence.
The Connection request step
Connection request sends the invite and stops. It doesn't wait for the lead to accept, so it has no acceptance window and no Not accepted port. Its ports are Then, Failed and Skipped. Put a Wait for after it:
- Connection request
- Wait for → Connection accepted, up to the number of days you are willing to wait
- Happened → a Wait after Happened of, say, 1 day → LinkedIn Message with the Follow-up role
- Timed out → the next touch on another channel, or End
The delay on the Happened line is what keeps the invite and the message on different days. A lead who is already connected skips the invite, passes the Wait for at once, and gets the message after that delay.
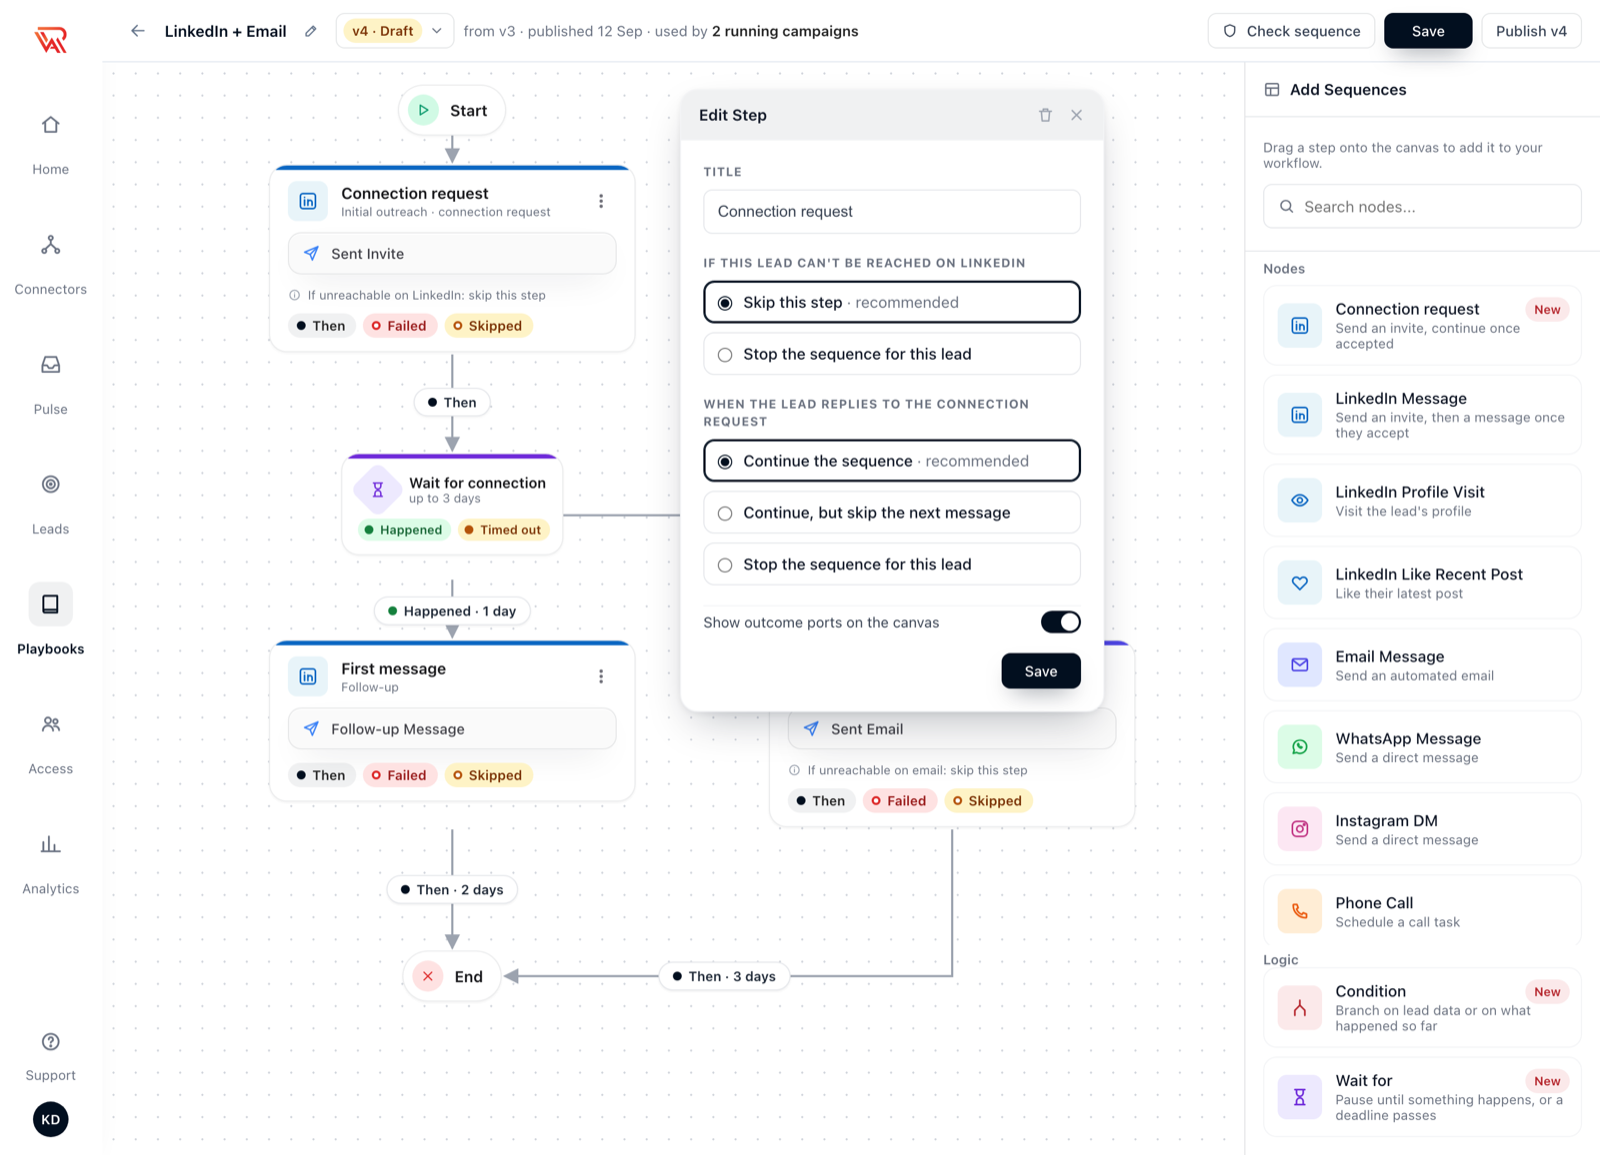
The step's settings are the reachability rule and When the lead replies to the connection request. It has no Outreach role setting: it is always an initial outreach. Write the note in the playbook: the step's block has one field, Connection Request, with a switch to turn the note off. A note is only sent if the LinkedIn account has an active Sales Navigator (LSN) subscription, the note isn't empty and it fits LinkedIn's limit; otherwise the invite goes out without it. The follow-up message has its own block.
Step 4: Check the sequence
Click Check sequence. It lists anything that stops the sequence from publishing, and warnings that don't. Each problem also shows as a badge on its step.
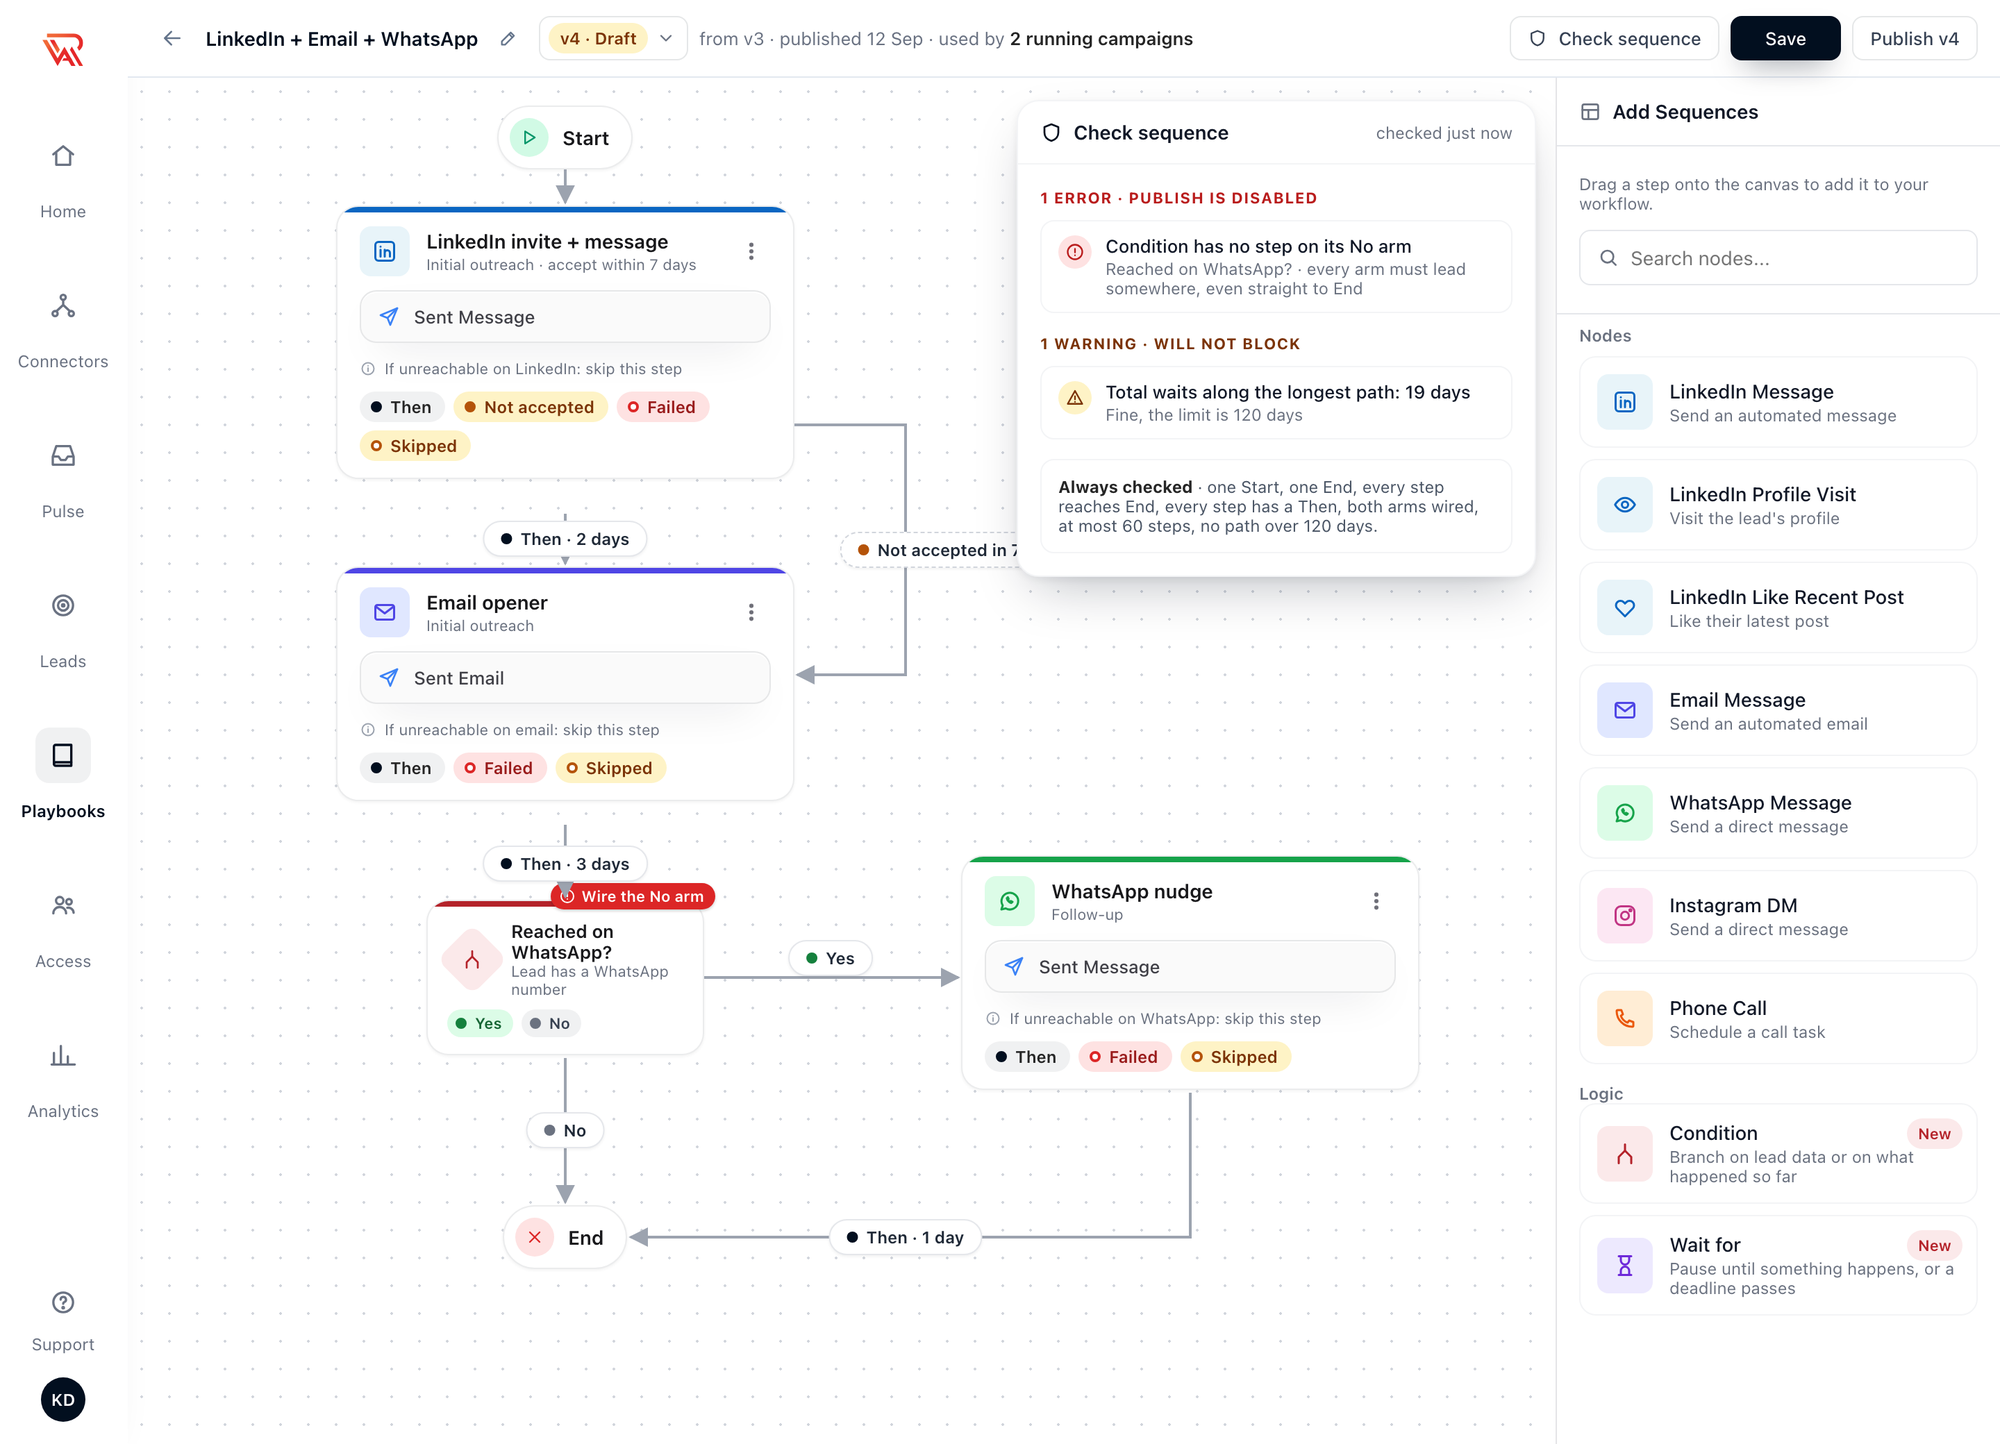
A sequence publishes only when:
- there is one Start and one End, and every step can reach End
- every step has a Then line, and every Condition and Wait for has both arms connected
- a Condition only checks things the steps before it can make true, and a Wait for only waits for events the steps before it can produce
- a follow-up email always has an earlier email on the way to it
- a sequence doesn't have both a Connection request and a LinkedIn Message with the Initial outreach role: both send an invite
- it has at most 60 steps (12 of them Conditions and Waits)
- no path, counting waits and acceptance windows, is longer than 120 days
Warnings never block. You'll see one, for example, for:
- a connection request with no acceptance window in a sequence that also sends email
- a LinkedIn Message follow-up with no connection request before it, because a lead who isn't connected waits there with no end (fine if every lead is already a connection)
- a message straight after a Connection request, with no Wait for between them: it goes out the day they accept, and a lead who never accepts is not moved on
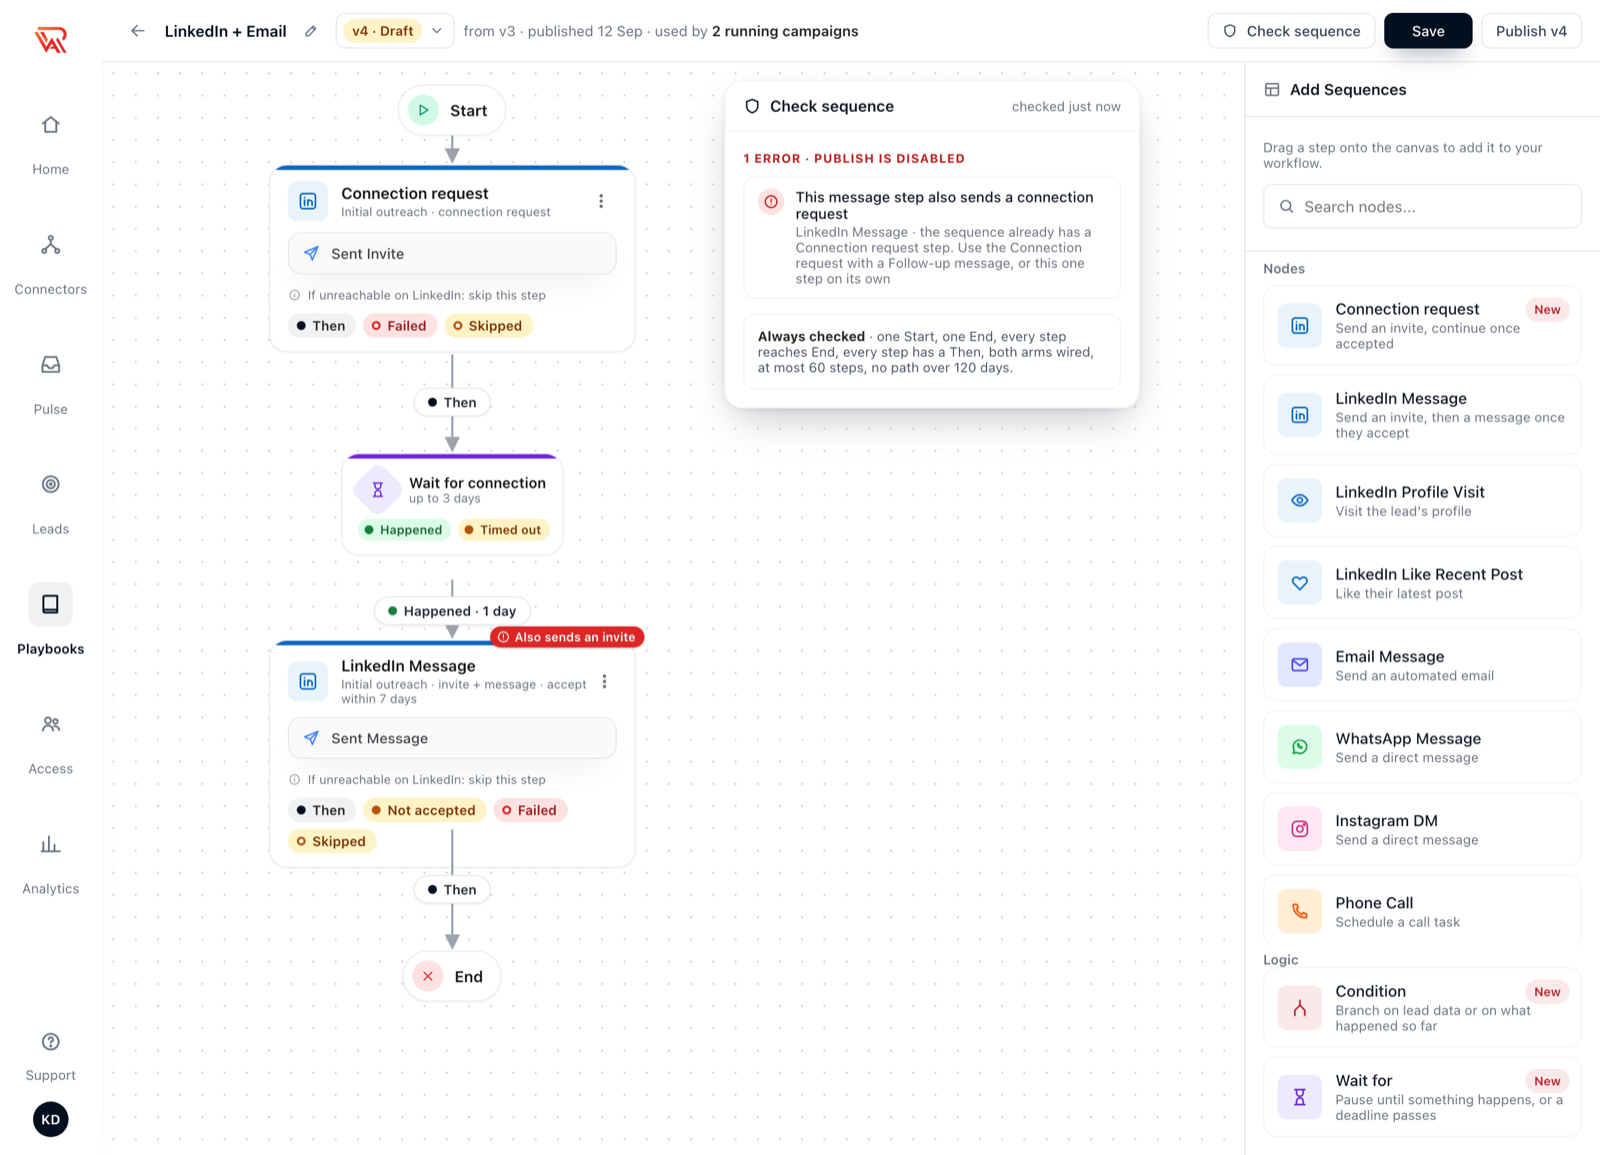
The image shows the one error of this kind: a Connection request and a LinkedIn Message with the Initial outreach role in the same sequence.
Two lines from the same port run both branches in parallel for that lead. It publishes only when the branches don't meet again at a step that sends, so no lead gets the same message twice.
Step 5: Save and publish
Save keeps your work as a draft. Nothing uses a draft.
Publish vN makes this version the one new campaigns use. Campaigns already running stay on the version they started with; the dialog lists them, and you can move each one when you are ready. See Versions and moving campaigns.
Step 6: Use it in a playbook
- Go to Playbooks and create or open a playbook.
- In Outreach Sequence, choose your sequence.
- Write or generate a message for every step. A Connection request step only has the connection note, and it is optional. For a step set to Agentic, also choose its Research depth and, under Advanced, its hooks and tone.
- Publish the playbook.
See Build manually or Generate with AI.
Before you publish
- Every channel step has the reachability rule you want. Skip this step unless the channel is essential
- Every LinkedIn connection request in a multi-channel sequence has an acceptance window and a route for Not accepted, or, with a Connection request step, a Wait for after it with a route for Timed out
- Every Condition and Wait for has both arms connected, even if one goes straight to End
- Waits leave the lead time to respond, and the longest path is a length you are happy with
- Check sequence shows no errors
Troubleshooting
| Issue | What to do |
|---|---|
| Publish is disabled | Open Check sequence and fix the errors it lists. Each one is also a badge on its step |
| A port I want isn't under the step | Hover over the step, or turn on Show outcome ports on the canvas in its settings. Not accepted appears only after you set an acceptance window |
| A Condition doesn't offer the check I want | It lists only what the steps before it can make true. For example, LinkedIn connection accepted needs a connection request earlier on the path |
| Leads skip a step I expected them to get | They can't be reached on that channel. Open the lead's progress to see the reason, or set the step to Stop the sequence for this lead if the channel is essential |
| Check sequence says a message step also sends a connection request | The sequence has a Connection request and a LinkedIn Message with the Initial outreach role. Change the message to the Follow-up role and put a Wait for before it, or delete the Connection request |
| The sequence isn't offered in a playbook | Only published sequences are listed. Publish it first |
| I changed a sequence but a running campaign behaves as before | Running campaigns stay on their version. Move the campaign to the new version from Campaign details |